For that matter, remember that one time when I wrote things?
I won't make any promises about keeping things up-- that always seems to end in embarrassment as I utterly fail to do so-- but this seemed worth resurrecting my blog for at least a day.
I MADE THIS.
I have been making this, rather, over the course of the past year. And by that I mean I started at the end of last summer, stopped for the entirety of the school year and most of this summer, and finally finished it this week.
It's a jewelry tree, if you're unfamiliar with the idea. I had been wanting one for a long time but all of the ones in the stores seemed way too expensive and way too small, so I decided to just make one myself. Wanna see how?
Here it is, in 20 easy steps. With lots of pictures!
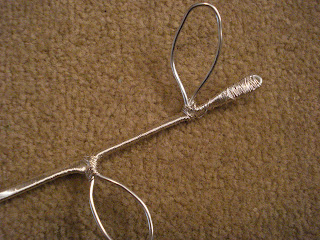
Step one: Fold a thick gauge wire into the shapes of branches, with little loops for leaves.
 |
| Congratulations! This was the easiest step. |
Step two: Start wrapping the branches in thin wire for support and prettiness, but without wrapping the leaves.
Step three: Accidentally get the thin wire horribly, irrevocably tangled. Cry.
Step four: Have your husband or some other kind soul untangle the wire for you.
Step five: Finish wrapping the branches, but leave the bottom four or five inches (the bent part) unwrapped to make "roots" later.
Step six: Buy the fabric, thread, and needles to make the leaves where earrings will hang.
Step seven: Get scared at the prospect of sewing anything by hand, even something so simple as this.
Step eight: Give up for almost a year.
Step nine: House sit for a friend who is both wonderfully supportive and a fantastic seamstress. Decide that the residual skill and encouragement lingering in the house is enough that maybe you can actually do this, and finally sew the first leaf on.
Step ten: Finish all the leaves in a few days because they were actually really simple.
Step eleven: Starting with the tallest branches and working your way down in batches, start using the thin wire to wrap again, this time wrapping several branches together to build the branches into a trunk.
Step twelve: Because it's been a year since you used it last, forget how ornery the thin wire is. Make a huge tangle again, but decide that this time you're going to fix it yourself, dammit.
Step thirteen: Create a wire octopus on your living room floor as you try to untangle the stupid wire, using decks of cards to hold the wire down without bending it.
Step fourteen: Wonder why in the world you have so many decks of cards. Be grateful that you've collected them anyway.
Step fifteen: Get the wire untangled and slowly add more branches until they have all been included. Wrap as far down as you'd like your tree to stand up, still leaving a few inches of the "roots" on the ends of the thick wire to make your base. (see first picture)
Step sixteen: Mold a pack of air-drying modeling clay into a mound and "plant" your tree in it, pushing the roots down into the clay until they're covered. Leave little bits of the roots showing through the clay if your artistic heart desires it.
Step seventeen: Force yourself to wait the 24 hours while your clay dries. Try to resist the urge to continue poking at the clay.
Step eighteen: Finally put your jewelry on the jewelry tree you made all by yourself.
Step nineteen: Stick the whole thing on a lazy susan so you can actually get to all of your jewelry.
Step twenty: Admire!


